Are you looking to take your epoxy projects to the next level? Have you heard about epoxy flakes and wondered what they are or how to use them? If so, you’re in the right place! Epoxy flakes are a fantastic way to add stunning effects and unique textures to your epoxy creations.
In this blog post, we’ll explore the world of epoxy flakes, uncovering their properties, benefits, and step-by-step techniques to achieve breathtaking results. Whether you’re a seasoned epoxy enthusiast or a beginner looking to experiment, get ready to unleash your creativity and discover the captivating possibilities of epoxy flakes.
Overview of Epoxy Flakes

Epoxy flakes are a popular and relatively inexpensive way to add decorative effects to residential and commercial flooring options, countertop finishes, and other surfaces. With the right combination of colors and application techniques, you can achieve stunning results with epoxy flakes.
From marbled floors to elegant designs on your countertops or walls, there’s no limit to the possible creative combinations you can make using this versatile material. It’s easy enough for DIY projects or hiring professionals for more extensive jobs; either way, it’s sure to make an impressive impact.
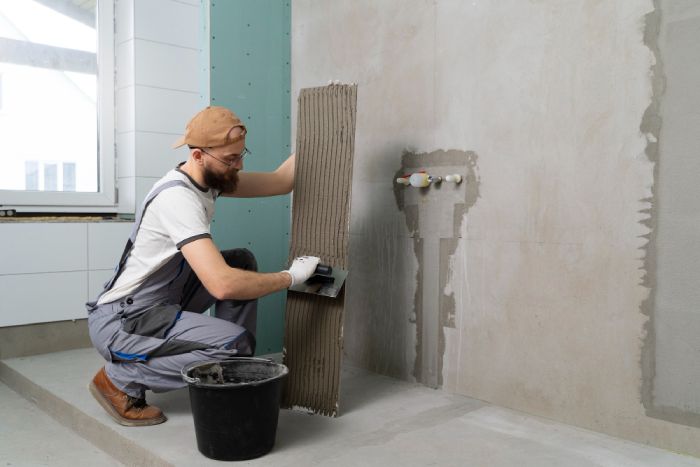
Preparation and Setup
Preparing a surface for epoxy flake application involves several essential steps. Here’s a detailed guide to help you with the process:
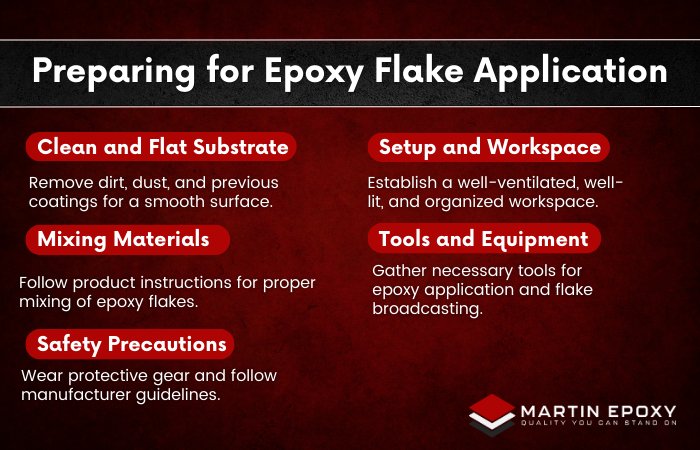
Preparing a surface for epoxy flake application involves several essential steps. Here’s a detailed guide to help you with the process:
- Clean and Flat Substrate: Before applying epoxy flakes, ensure that the surface is clean and free of any dirt, dust, grease, or previous coatings. Use a scraper or sander to remove any existing paint or sealant, creating a smooth and even surface for optimal adhesion.
- Mixing Materials: Prepare the epoxy flakes according to the instructions provided on the product label. Follow the recommended mixing ratios and thoroughly blend the epoxy resin and hardener. Use clean containers and mixing tools to prevent contaminants from interfering with the epoxy curing.
- Safety Precautions: When working with epoxy products, it’s crucial to prioritize safety. Wear appropriate protective gear, including gloves, safety glasses, and a respirator if necessary, to protect yourself from any potential hazards associated with the epoxy resin and hardener. Follow all manufacturer guidelines and safety protocols to minimize risks.
- Setup and Workspace: Set up a well-ventilated and adequately lit workspace that allows you to access all necessary tools and materials quickly. Ensure that the area is free from any obstructions or tripping hazards. Lay down drop cloths or protective sheets to prevent epoxy spills or drips from damaging surrounding surfaces.
- Tools and Equipment: Gather all the tools and equipment needed for the epoxy flake application. It may include a paint roller or brush for applying the epoxy resin, a trowel or squeegee for spreading and leveling the epoxy, and a chip brush or broom for broadcasting the epoxy flakes onto the wet surface. Also, have clean containers for mixing the epoxy, stirring sticks, and any other recommended tools specific to your epoxy flake system.
By following these preparation and setup steps, you’ll create an environment that promotes successful adhesion and a smooth application of epoxy flakes, leading to beautiful and durable results.
Application Techniques
Epoxy flake application is an art form! There are a few techniques that can support you to achieve stunning results. Here’s how to get started:

- Use a trowel or squeegee for large areas, like garage floors and pool decks. It will ensure even coverage of your flakes.
- When applying epoxy flakes in smaller areas, use a brush or roller to ensure every nook and cranny gets coated.
- For outdoor installations, use extra care when preparing the surface. Be sure to apply an additional sealant once the epoxy has cured.
- And remember that proper ventilation is essential when working with these materials – open windows and wear protective gear to avoid fumes!
These installation techniques have been used by epoxy flake experts for years. Now it’s time to take your project up a notch with some finishing touches – like decorative accents and borders! Get creative and see what distinctive designs you can come up with. Your next masterpiece awaits!
Finishing Touches

Once the epoxy coating is applied and dried, you’ll want to add a few finishing touches. The most important of these is the sealant application. Ensure that any area with an exposed surface has been appropriately sealed; otherwise, it will be susceptible to water damage or other environmental factors. Several types of sealants are available, so choose one that works best for your project.
Another great idea when applying an epoxy finish is to use decorative flakes in a variety of colors and sizes. It can create stunning effects as light reflects off different areas of the design. Mix and match various colors for added depth and sparkle in certain spots. Just plan ahead before adding too many flakes so they all fit together nicely without clumping up in one spot.
Finally, once everything is finished, apply another layer of sealant for protection from dirt, dust, moisture, and other elements that could affect its appearance over time. With this extra step complete, your epoxy flake project should look amazing!
Creative Uses for Epoxy Flakes
Epoxy flakes offer a multitude of creative uses to transform any space. They can be used in custom epoxy flake art, jewelry pieces, flooring, and much more. Here is a detailed explanation of this creative uses:
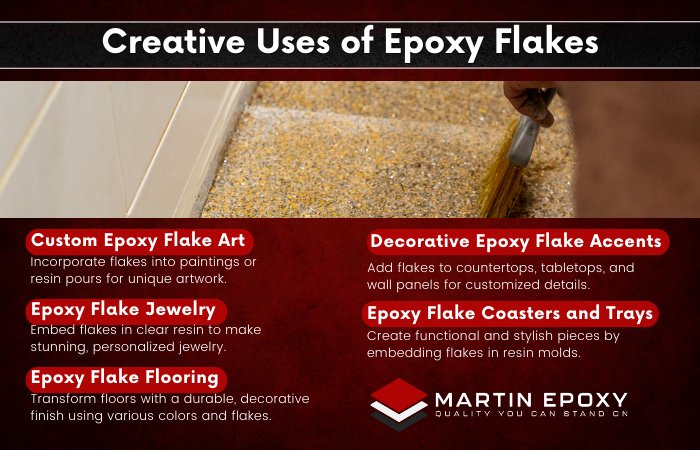
Epoxy flakes offer a multitude of creative uses to transform any space. They can be used in custom epoxy flake art, jewelry pieces, flooring, and much more. Here is a detailed explanation of this creative uses:
- Custom Epoxy Flake Art
Create unique artwork by incorporating epoxy flakes into your paintings or resin pours. Sprinkle the flakes onto the wet epoxy surface or mix them into the resin before pouring. Experiment with different colors, sizes, and patterns to achieve the desired effect. You can create abstract pieces, landscapes, or even realistic designs.
- Epoxy Flake Jewelry
Embed epoxy flakes into clear resin to make stunning jewelry pieces. Mix the flakes into the resin and pour it into molds to create pendants, earrings, or bracelets. You can also layer the flakes to achieve a multi-dimensional look. The result is beautiful, one-of-a-kind jewelry that reflects your style.
- Epoxy Flake Flooring
Transform your floors with epoxy flake flooring. Apply a base coat of epoxy to the floor and sprinkle the flakes evenly over the surface while it’s still wet. Once dry, apply a clear topcoat to seal and protect the flakes. It creates a durable, decorative floor finish that adds texture and visual interest to any space. You can choose from various colors and flakes to match your desired aesthetic.
- Decorative Epoxy Flake Accents
Add epoxy flakes as decorative accents to various surfaces. For example, you can mix them into clear epoxy to create unique countertops, tabletops, or wall panels. The flakes can be scattered randomly for a subtle effect or arranged in specific patterns for a more detailed look. It allows you to customize and personalize your living space with eye-catching details.
- Epoxy Flake Coasters and Trays
Make functional and decorative coasters or trays by embedding epoxy flakes into resin molds. Mix the flakes into clear epoxy and pour it into a coaster or tray mold. Once cured, you’ll have beautiful pieces that can protect surfaces while adding a touch of style to your home.
Remember, when working with epoxy flakes, always follow the manufacturer’s instructions and safety guidelines. The possibilities for using epoxy flakes are virtually limitless, so let your imagination run wild and enjoy the process of creating something exceptional!
Curing and Maintenance
Curing and maintaining epoxy flakes is crucial for a stunning and durable finish. Here are some detailed steps for curing and maintaining epoxy flakes:
Curing Process:
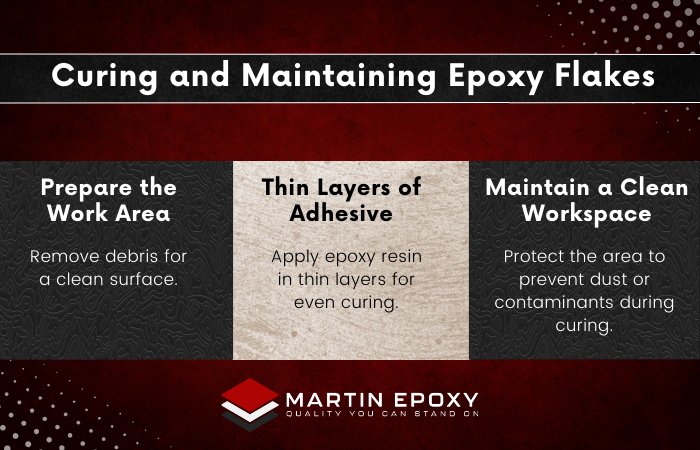
- Prepare the Work Area: Remove any loose debris, dust, or particles from the surface where you applied the epoxy flakes. It will ensure a clean and smooth finish.
- Use Thin Layers of Adhesive: When applying the epoxy resin that will hold the flakes in place, it’s best to use thin layers. Thicker layers take longer to cure and may result in an uneven surface.
- Maintain a Clean Workspace: Protect the work area using plastic sheets or tarps throughout the curing process. It will prevent dust or contaminants from settling on the epoxy while it cures.
Maintenance Tips:
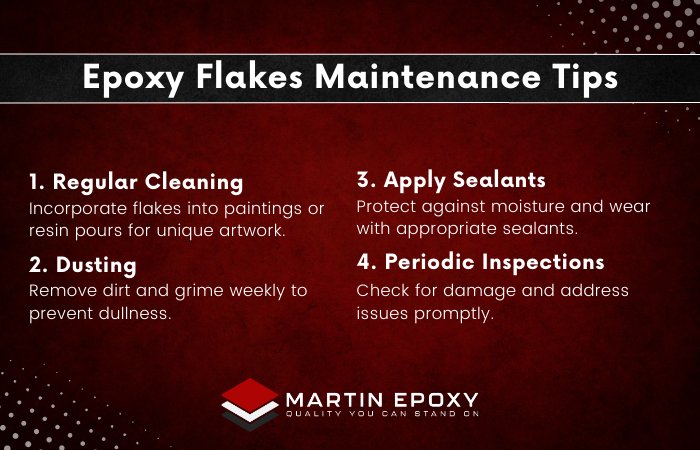
- Regular Cleaning: Clean the surface regularly to keep your epoxy flakes project looking its best. Use a damp cloth and gentle cleansers specifically made for epoxy surfaces. Avoid abrasive cleaners that can damage the epoxy.
- Dusting: Dust off any dirt or grime every week. It will prevent the accumulation of particles that can dull the appearance of the epoxy flakes.
- Apply Sealants: Depending on the specific epoxy product you used, you may need to apply a sealant to protect against moisture damage and everyday wear and tear. Follow the manufacturer’s instructions for the appropriate sealant to use.
- Periodic Inspections: Regularly inspect the epoxy flakes’ surface for any signs of damage or issues. Look for chips, cracks, or areas where the epoxy has lifted. Catching these issues early will enable you to address them promptly and prevent further damage.
By following these guidelines for proper curing and maintaining your epoxy flakes project, you’ll ensure that your finished product looks impressive and remains beautiful over time!
The Bottom Line

DIY projects using epoxy flakes offer stunning and elegant results. The process is simple, requiring proper surface preparation and application of the flakes. To enhance durability, a sealant should be applied to shield against moisture and wear and tear. With creativity, patience, and care, anyone can achieve remarkable effects with epoxy flakes. So don’t be intimidated – get creative today and start making something unique!
So if you’re seeking a company to bring your epoxy flake projects to life, Martin Epoxy is the best choice. With our expertise and dedication, we’ll cater to everything you need. Contact us today!